Week #1 - LMS Set-Up and Content Upload
LMS Evaluation Introduction

Welcome to the 1st week of evaluations between the capabilities of Desire2Learn and Blackboard. This week five tools were examined within each system. These tools included:
- Setting up a course
- Creating modules
- Adding third-party content
- Creating content using an HTML Editor
- Adding images through the HTML Editor
D2L LMS Evaluation
Tool #1 Setting Up Course
In D2L, you can manually add participants by searching for the name. You should be aware that partial searches are not allowed (for example, search for Josh W*) and you have to spell the name correctly for records to found. You can also assign a role to participants. Some examples are student, teaching assistant, and co-faculty. In summary, the overall findings of the setting up a course feature:
- Strength: Very user friendly process
- Weakness: You must spell name correctly and can not use partial searches

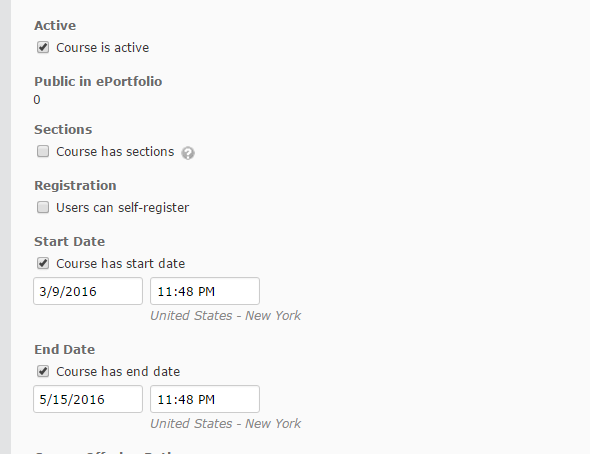
One important step that must be done when setting up a course in D2L is to make sure the class is activated. This is done clicking into the course administration link and selecting course offering and simply clicking the active box. You can select appropriate dates for the course to be active. One thing I liked about this feature is that an instructor could create, add materials to, or play around with their course without the students being able to access the course materials until permitted. However, the major draw is if the instructor forgets to check this box, no content is visible to the participants. Although this is a simply process it is not very intuitive to find without having explicit directions. In summary, the overall findings of the activating a course feature:
- Strength: Keeps course materials invisible until you are ready to release it
- Weakness: Not intuitive to do or find without instructions
Tool #2 Creating Modules
When creating modules in D2L, you simply go into the content area and click in the box that states "add module". This is very simple to do. I did not find any drawbacks in this feature. In summary, the overall findings of the creating a module feature:
- Strength: Very simple to do
- Weakness: None

Tool #3 Adding Third-Party Content
In D2L, adding third party content is rather easy but only once you know the sequence of links and clicks. In the content area, you simply select the correct module to place the content in then you click the "add activities" tab and select external learning tools. You then search for the appropriate links - for example atomic learning. In the case of adding atomic learning content, you have to search for the appropriate training and once again the proper spelling and formatting for the search is needed or no results will be provided. Once you select the correct topic you enter here into it and check all the boxed for the content. Then you must preview your selections and then submit it. Then you have to click to return to your course as you are not sent there directly. Next, you will want to customize the name of the training since the participants may be receiving multiple tutorials and training. However, in order to edit the name you must click into the link and go onto the next screen where you can edit the topic name here. This is a very clumsy process. Below is a video to guide you through this cumbersome process. In summary, the overall findings of the activating a course feature:
- Strength: D2L has the functionality to add third party content
- Weakness: Very clumsy process and not intuitive to do or find without instructions
Tool #4 Creating Content Using An HTML Editor
In D2L there is a feature "creating content using HTML editor". In the content area, you select your module and click on new file. In the next screen, you enter a title and enter your text. You can cut and paste text into the text box but you may loose some of your formatting. When completed you click publish and you are done. In summary, the overall findings of the creating content using HTML editor feature:
- Strength: D2L has the functionality to add content using HTML
- Weakness: May loose some of your formatting if using cut and paste

Tool #5 Adding Images To HTML Editor Pages
You can also add images to D2L through the HTML Editor. In the content area, you select your module and click on new file. In the next screen, you enter a title and click on the insert image box on the tool bar. It does ask for an alternative text for your image automatically which is a great feature. If you need to edit your image this is possible in D2L but not necessarily intuitive. I tried to search the D2L help link about this but could not find a link. I had to go onto youtube to find out if and how this could be done. When you are completed you click publish and you are done. In summary, the overall findings of the creating content using HTML editor feature:
- Strength: D2L actually has the functionality to add images using HTML, Alternative text asked for automatically
- Weakness: Formatting and editing your image is not intuitive or user friendly.

Blackboard Evaluation
Tool #1 Setting Up Course
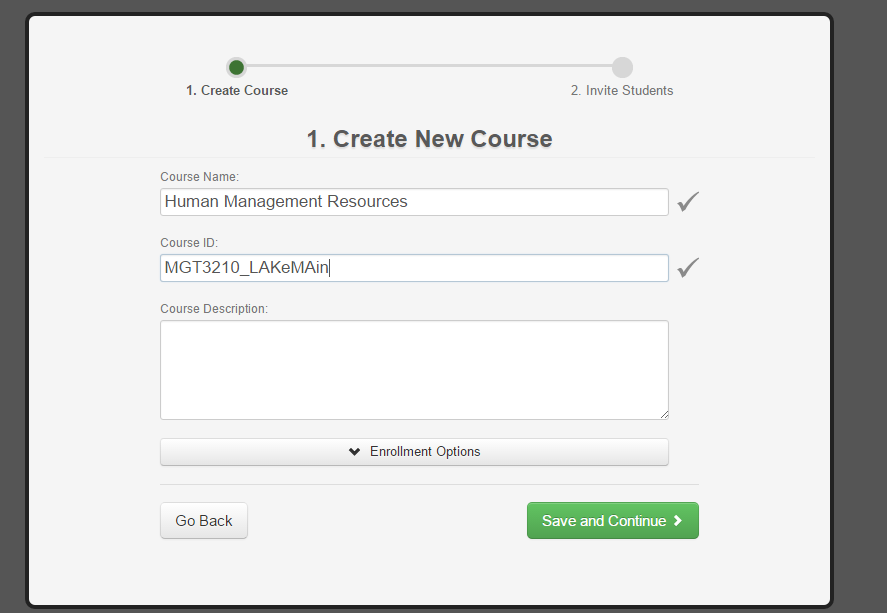
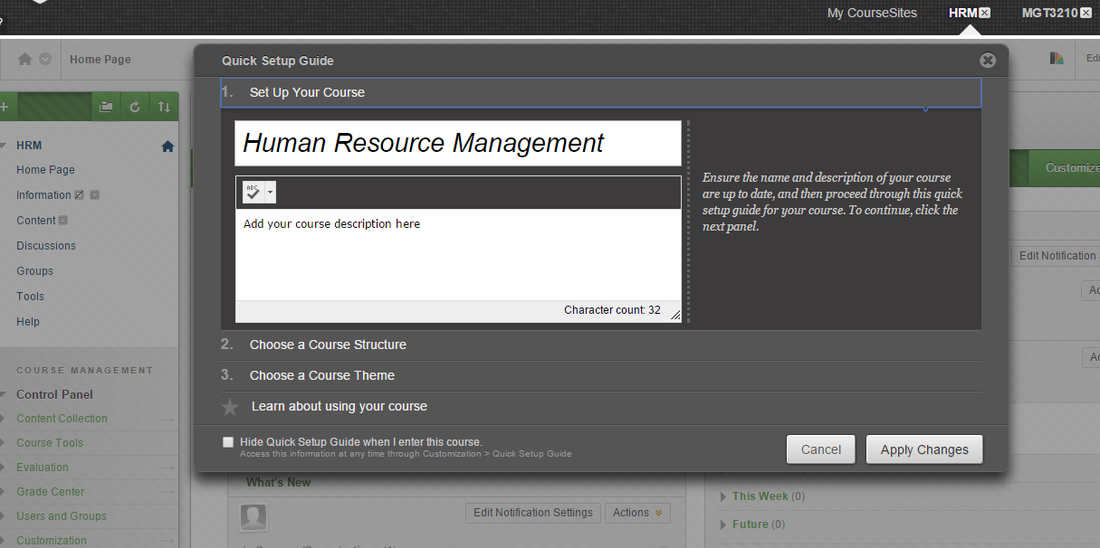
Setting up the course in Blackboard was very easy. It asked for the course name, course ID, and a course description (optional). In addition, you are asked if you are importing a course package or creating a new one. Once inside your course the Quick Setup Guide appears. This allows you to check the title of the course, provide a course description, choose a course structure, and a course color theme. I thought this feature was nice since you could personalize your course upfront and was user friendly.
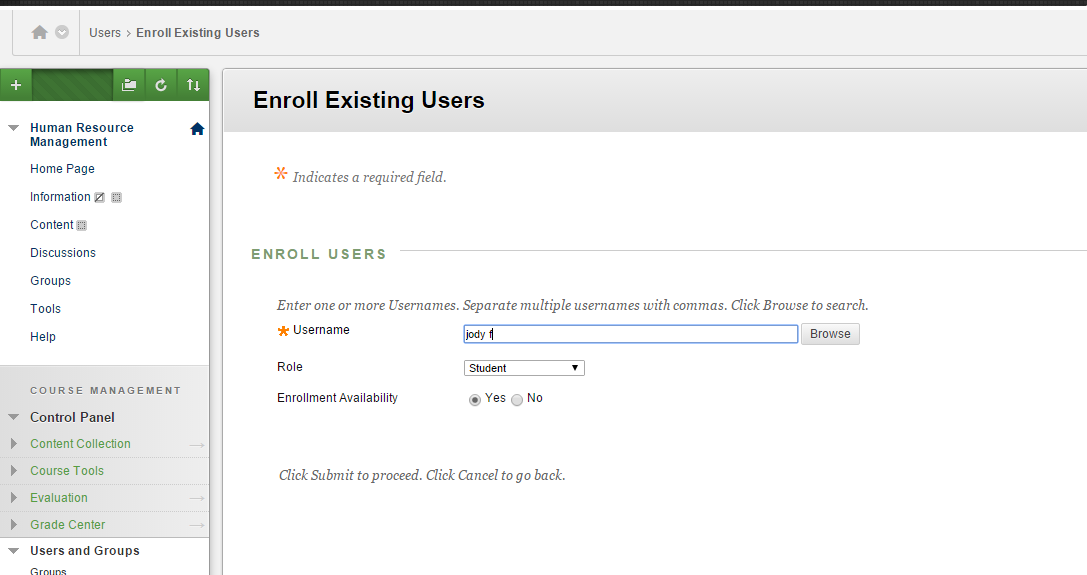
Next, you are given an option to manually enroll your students or to allow open enrollment. You can also invite students to enroll via email invitation, which can be done in a batch. You can monitor the invitations sent as well to see if they have been accepted or not. You can also assign a role to the participant. These role include student, instructor, teaching assistant, course builder, and guest. However, finding how to enroll users was not intuitive since there is a course management section with users and a course section with groups so an instructor may not know which to use to enroll participants. However, their is a CourseSites Quick Start Guide PDF file for instructors to download which has screen shots and straight forward instructions. In summary, the overall findings of the creating a course:
- Strength: Easy set up, CourseSites Quick Setup Guide was a plus
- Weakness: Enrollment using users not intuitive to find
Tool #2 Creating Modules
The first step in adding course modules in Blackboard is to make sure the Edit button is turned on. Then you proceed to click under the "+" on the main page and select "Content Course Area" and give the content area a new title and make it visible to students. This is a bit confusing to use since their already is a content link in the course main menu. I had to refer to the Quick Start Guide to understand the different levels within the course menu. Once I did this it made the process very easy. In summary, the overall findings of the adding a course module:
- Strength: Easy set up once the process is understood.
- Weakness: Confusion between what is a content area and the content link already on the course menu needs to be understood before proceeding.
Tool #3 Adding Third-Party Content
Using the "+" on the tool bar you can click into the external link to add a public website outside of Blackboard. You could also use the tool link which links you to the Blackboard tools. Although Atomic Learning was not accessible during the trial run of Blackboard. Atomic Learning does offer Blackboard training (Atomic Learning, 2016). I would assume this would be accessed under the Blackboard "tool link" but was not sure about this. I was able to find a tool link for McGraw Hill Connect tools and found the process to add this rather straight forward. I would hope the same would be true for Atomic Learning. For this link, a drop-down menu appeared and you selected the appropriate tool. I have provided a screen shot to show how the content appears from the McGraw Hill example.
I also tried adding an external link and the process was very easy as well but you do have to type in the link starting with http:/ or it will not be a valid web address. I have provided a screen shot for this as well. In both cases you have to remember to make it visible to students. In In summary, the overall findings of the adding a third party content:
I also tried adding an external link and the process was very easy as well but you do have to type in the link starting with http:/ or it will not be a valid web address. I have provided a screen shot for this as well. In both cases you have to remember to make it visible to students. In In summary, the overall findings of the adding a third party content:
- Strength: Can add both a external link and the tools for Blackboard link
- Weakness: Confusion about which to select to add content - the tool link versus external link


Tool #4 Creating Content Using An HTML Editor
When you go into one of your created content area you can build content and create a file. Here you can use the HTML Editor. On the screen, you enter a title and enter your text. You can cut and paste text into the text box but you may loose some of your formatting. When completed you click submit and you are done. In summary, the overall findings of the creating content using HTML editor feature:
- Strength: Blackboard has the functionality to add content using HTML
- Weakness: May loose some of your formatting if using cut and paste option. Paste option did not work - have to use the "ctrl v" option to paste.

Tool #5 Adding Images To HTML Editor Pages
In Blackboard, you can add an image through building content and adding an image. The only problem I encountered was not being able to edit the image. I tried the edit tab and this only allowed to edit the attached image file. I tried to click on the image and nothing happened. You can scroll across the length of your image but could not shrink it into one frame. I used the same image for both LMS for consistency. In Blackboard you could only see the sky and no building or water without scrolling up and over. In summary, the overall findings of the adding images through the HTML editor feature:
- Strength: Blackboard has the functionality to add an image using HTML
- Weakness: The ability to edit the size of photos was not found.

LMS Weekly Recommendation
Based on the tools that were evaluated this week, I would say that most features were more straight forward in D2L. I also found that when searching for help outside of the two systems, I found more helpful tips and links about D2L. Therefore, this week's winner would be D2L.

References
Atomic Learning (2016). Blackboard learning 9.1 - Student training. Retrieved from https://www.atomiclearning.com/highed/bb9_student
